


Stencil Design for Laser Cutting: Essential Tips and Tricks
Welcome to the world of stencil laser cutting and know how precision mixes with creativity to unlock many possibilities. Have you ever wondered what stencil laser cutting is and how it can change your design? Let’s dive in and explore the details of this fascinating technique.
[edit] What are Stencils in Laser Cutting?
Stencil laser cutting is a highly accurate technique where a laser beam carefully removes material from specific areas to create two-dimensional images or words. The laser follows a digital design file, precisely cutting along set paths to produce stencils. These stencils have cut-out spaces where you can apply paint, ink, or other materials to replicate the design easily. It’s a fantastic way to create detailed templates for various projects. By following the tips below, you can easily create stencil designs for laser cutting.
[edit] Tips for Stencil Design for Laser Cutting
Now, let’s learn several tips for stencil laser cutting that will guide you through the whole process, so you can create or make stencil designs with just a few simple steps:
[edit] Tip 1. Choose the Right Material:
The quality of your stencil largely depends on the material you choose. For laser cutting, opt for materials like acrylic, wood, or Mylar. Additionally, pay attention to the thickness of the material. Thinner materials are not only easier to cut but also allow for finer details in your stencil design.
[edit] Tip 2. Simplify Your Design:
When designing a stencil for laser cutting, simplicity is key. Intricate designs with complex details may not translate well to the laser-cutting process and can lead to issues such as burning or incomplete cuts. Focus on clean lines and bold shapes to ensure optimal results. Additionally, seeking assistance from a reputable company that provides online services for laser cutting and engraving can greatly aid in achieving your desired outcome.
[edit] Tip 3. Pay Attention to Line Thickness:
The thickness of the lines in your stencil design plays a crucial role in its effectiveness. Lines that are too thin may be prone to breakage during cutting, while lines that are too thick can result in a difficult stencil. Aim for a line thickness that strikes the right balance between durability and usability.
[edit] Tip 4. Test Your Design:
Before committing to cutting a full-scale stencil, it’s essential to test your design to ensure it meets your expectations. Many laser-cutting services offer prototyping options that allow you to test your design on a smaller scale before proceeding with the final cut. Use this opportunity to make any necessary adjustments to your design.
[edit] Tip 5. Consider Bridging and Anchoring:
Bridging and anchoring are techniques used to support delicate parts of a stencil during the cutting process. By strategically placing bridges or anchors within your design, you can prevent small pieces from shifting or breaking off during cutting, resulting in a more durable stencil.
[edit] Tip 6. Optimise Cut Settings:
Different materials need different settings to cut well. Try adjusting the cutting speed, power, and frequency to find the best combination for your material. Remember, you might need to tweak these settings depending on how detailed your design is and what your laser cutter can handle.
[edit] Tip 7. Maintain Proper Alignment:
Keeping everything lined up correctly is important, especially for stencils with multiple layers or fine details. Use alignment guides or marks to make sure each layer fits perfectly, giving you a seamless final product.
[edit] Tip 8. Post-Processing and Cleaning:
After cutting your stencil, you might need to clean it up to get rid of any leftover debris or residue. Depending on the material, this could mean rinsing the stencil with water or using a gentle cleaner to remove any stubborn bits.
[edit] Tip 9. Store Your Stencils Properly:
Properly storing your stencils is key to keeping them in good condition for a long time. Lay them flat in a clean and dry place to avoid warping or damage. Using protective sleeves or containers can help protect them from dust and debris when you’re not using them.
In summary
Getting good at stencil design for laser cutting means paying close attention to details and being open to trying out different methods and materials. By following the tips in this guide, you can make stencils that work well and look great.
Featured articles
Check out some of the best features and news from Designing Buildings as well as key stories from around the web.

Combining mid-career qualifications with experience broadens career opportunities.
![]()
Why being a mentor can help your career.

Channel 4 broadcaster to host 125th anniversary ceremony.
Listed structures on the rail network
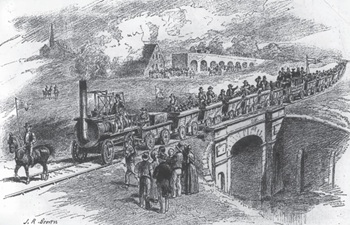
Heritage interests and operational requirements must be balanced.
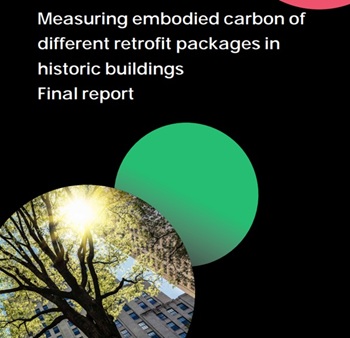
Historic England publishes research into embodied carbon when retrofitting traditional buildings.

New Prime Minister delivers on ECA call for cut in electricity costs.

CIOB reacts to the announcement of Andy Burnham as Prime Minister.

Heritage and conservation science workforce survey - Have your say.

England's Suburbs 1820-2020. Book review.

New, more proportionate and targeted approach for higher-risk building assessments.
Government brings British Steel into public ownership.

UKCW Birmingham returns with bold new theme and focus.